NOTE: The used RC-Servos that are mentioned below did break quite often. I recommend looking for more robust ones in the same standard size.
I found this robot http://www.feetechrc.com/product/ft-robot/feetech-completely-assembled-bipedal-humanoid-robot-ft-17dof-sc-rtp/ to be mechanically quite impressive at a good price. Have it at home. They can provide you with video of it and price. However documentation is not in english (or was not few years ago). And you would need to establish an interface between raspberry pi and this robot control board…
Manual
Some of the parts have to be bought abroad. Aliexpress is a big international platform like ebay. To buy at aliexpress is very secure, the money is protected by the platform. I found it to be quite easy to get the money back in case the item is not received. All items that are ordered abroad can take up to 4-5 weeks to arrive and might be stopped in the custom and you might need to pick it up and pay import tax (in germany it is 19% tax and only charged in case the shipping of the same shop is >25EUR).
When you search yourself at Aliexpress, I recommend to filter for “free shipping” and maybe sort by price.
When you buy at Hobbyking, be sure to select all products from the same and correct warehouse [EU, USA, International]. Note that the International warhouse is in China, so delivery times are longer and import tax needs to be paied. I recommend to use local warehouse.
The mentioned shops are only examples, you should check for your country to combine items and find a cheap shop for it.
Missing in the table below are:
- screws to fix the raspberry and some plastic parts (partly screws of the robot kit can be used for this)
| Name | Recommended Link | Link alternative Germany | Search | Cost [€] | Picture | |
| 1 | Robot Sceleton | Aliexpress | Ebay | Search on ebay or aliexpress for “17 dof”. dof= degrees of freedom. Buy a robot that looks like this one. | 60 | 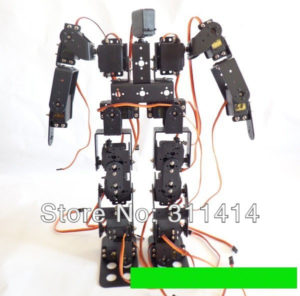 |
| 2 | 45° Brackets for Back protection (electronics protection) | Search on ebay or aliexpress for “robot bracket”. Choose the one that is shown in the picture and order 2 of them. | 3 | 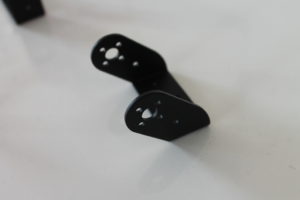 |
||
| 2 | Hand extension to allow stand up from each position | Search on ebay or aliexpress for “robot bracket”. Choose the one that is shown in the picture and order 2 of them. | 3 | 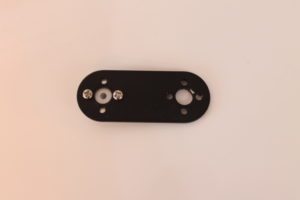 |
||
| 17 | Servo Horn | Aliexpress (20 in one set) | Ebay | Search on aliexpress for “robot servo horn”. I found they have different quality (they have play…), I recommend to use the aliexpress link on the left. | 14 | 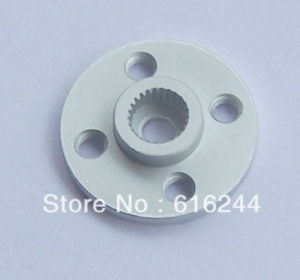 |
| 17 | Servo MG946R (996R is also ok) | TowerPro (5 in one set/lot) | Hobbyking | Do not buy too cheap servos on aliexpress or ebay. I found them often to be not original and not to work. They use a different electronic and material. However in general you can use any standard RC servo of the same size. Important is that the servo is not too heavy and strong enough. You might be able to improve the robot by choosing a more expensive servo, however I could not find much difference with other servos in the price range of 1.5x this price. |
130 | 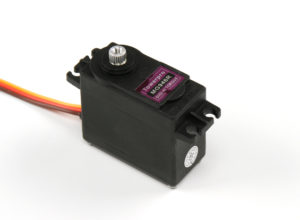 |
| 1 | Battery | Hobbyking | Hobbyking | You can use any LiFePo4 2S battery, that fits into the robot. Connector must fit to the charger, we use XT-60 here. | 10 | 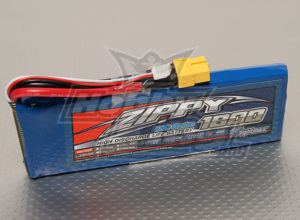 |
| 1 | Charger | Hobbyking | Hobbyking | Be sure to have a charger with the right plug for your country that can charge LiFe batteries and has a XT-60 connection for the battery. | 30 | 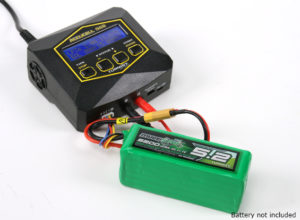 |
| 1 | Acc & Gyro | Aliexpress | see left | You can search on aliexpress for MPU 6050 | 2 | 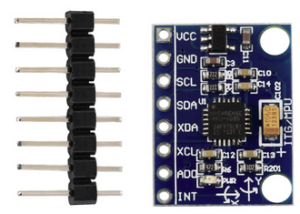 |
| 3 | 30cm Cable | Aliexpress (10 in one set/lot) | Hobbyking | Be sure to enter the correct length! You can search for “servo extension” at aliexpress or hobbyking. One is for the mouth LED. | 2 | 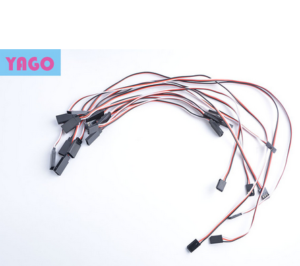 |
| 6 | 15cm Cable | Aliexpress (10 in one set/lot) | Hobbyking | Be sure to enter the correct length! You can search for “servo extension” at aliexpress or hobbyking. | 2 | |
| 1 | Raspberry Pi 3 | Amazon | Pollin | You can buy a raspberry pi 3 in most electronic shops, just google “raspberry pi 3”. See below for possible shops. | 35 |  |
| 1 | Micro SD Card 16-64GB (see “SW” section for needed card size) | EXP-Tech | Pollin | Can be bought in a lot of electronic shops, see below for possible shops. | 6 |  |
| 1 | LAN cable | Amazon | Pollin | Can be bought in a lot of electronic shops, see below for possible shops. | 1 |  |
| 1 | Raspberry Camera V1 or V2 | EXP-Tech | Pollin | Can be bought in a lot of electronic shops, see below for possible shops. | 30 | 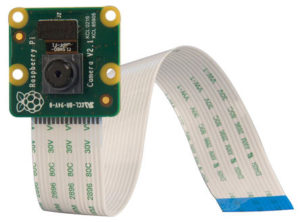 |
| 1 | Camera Cable 30cm | EXP-Tech | see left | A 30cm cable that fits to the camera of the raspberry pi is needed | 2 | 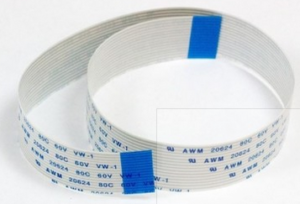 |
| 1 | Sound card | Aliexpress | Pollin | Can be bought in a lot of electronic shops, see below for possible shops. Buy the same one as in the picture! | 2 |  |
| 1 | Mic | Aliexpress | Pollin | Any microphone can be used, however the plug should be small to fit in the robot. Can be bought in a lot of electronic shops, see below for possible shops. | 1 | 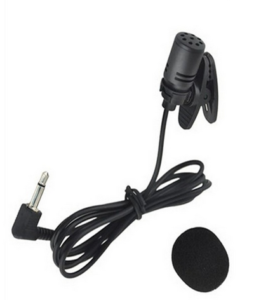 |
| 1 | Speaker Trust Izzi | Pollin | Search for “trust izzi” on google, amazon, ebay, aliexpress to get the speaker in your country. Note you can use any other speaker with 3.5mm connector and USB loading, but need to fix it in the robot and the cable should be long enough (e.g. this one, however cable is short. You can open the speaker and pull the cable out, so it is longer outside and shorter inside the speaker). | 10 |  |
|
| 1 | Mouth LED | Amazon (30 in one set/lot) | Pollin | Use any 5mm LED in the color you need. The LED is switched on very short only, so all voltages should be ok. | 1 | 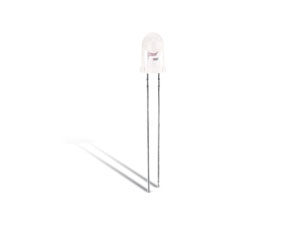 |
| 1 | Raspberry voltage supply | Pollin | 5V 2A voltage supply for the raspberry | 8 | 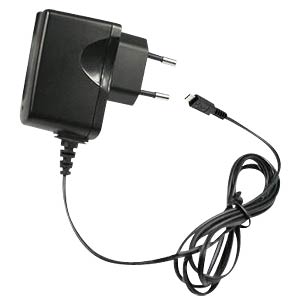 |
|
| Note that you might need to pay 19% tax additionally on some parts from abroad. | 350 € | |||||
| Parts that are needed for the PCB | ||||||
| 3 | PPTC
I(hold) 1.3A |
Reichelt (PFRA 135) | Resetable fuse: Gives a minimum protection for the servos from breaking in case of too high current. 1 is replace part. | 1 |  |
|
| 1 | 2.54mm male pin 2×10 | Reichelt | For servo connection | 0 | 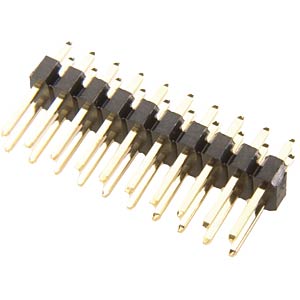 |
|
| 1 | 2.54mm male pin 2×20 | Reichelt | For servo connection | 1 | 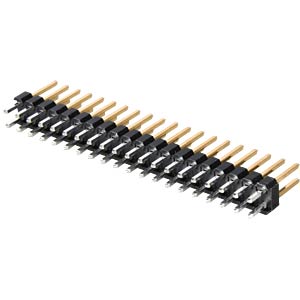 |
|
| 1 | 2.54mm male pin 1×20 | Reichelt | For servo connection | 1 | 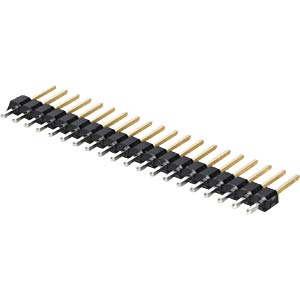 |
|
| 1 | 2.54mm male pin 1×10 | Reichelt | For servo connection | 0 | 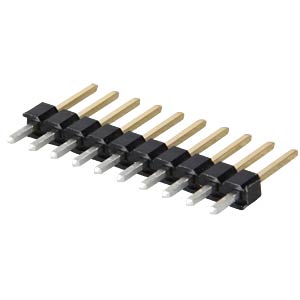 |
|
| 1 | 2.54mm male pin 1×4 | Reichelt | For servo connection | 1 | 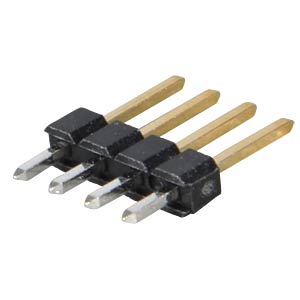 |
|
| 1 | L4940V5 Low drop 5V 1.5A voltage regulator | Reichelt | For powering the raspberry pi with 5V from the 6.6V battery and servo power | 1 | 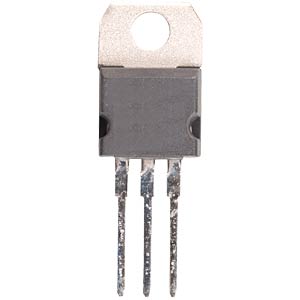 |
|
| 1 | 100nF capacity | Reichelt | For stability of 5V voltage regulator | 0 | 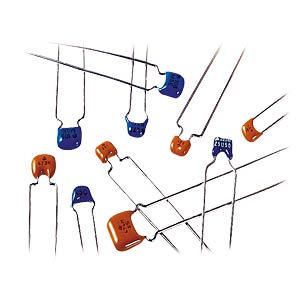 |
|
| 1 | Elko 10uF rm 2mm | Reichelt | For voltage measurement of battery | 0 | 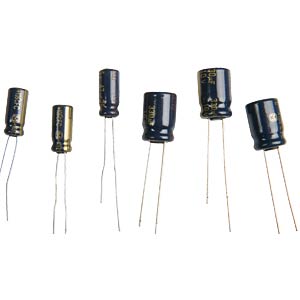 |
|
| 1 | Tantal rm 2,5 22uF 16V | Reichelt | For stability of 5V voltage regulator | 0 | 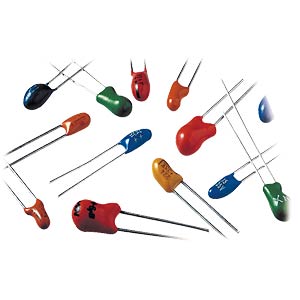 |
|
| 1 | JST 2S connector | Hobbyking | Hobbyking | For connection of the battery | 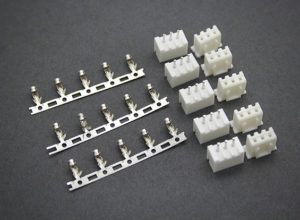 |
|
| 2 | 2.54mm female pin header | Reichelt | For connection of the servo board to the raspberry pi | 2 | 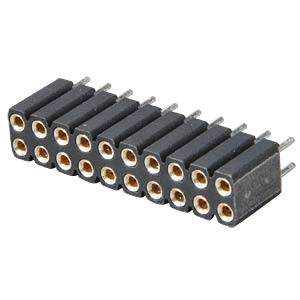 |
|
| 1 | resistor 510 ohm 1% | Reichelt | voltage divider to measure 6.6V battery voltage at 3.3V raspberry pin | 1 | 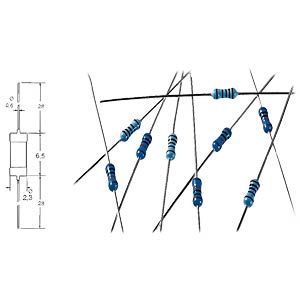 |
|
| 1 | resistor 330 ohm 1% | Reichelt | voltage divider to measure 6.6V battery voltage at 3.3V raspberry pin | 0 | |
|
| 1 | resistor 14,000 ohm 1% | Reichelt | current limitation for capacitor loading – used for voltage measurement | 0 | |
|
| 1 | Switch | Switch the robot on and off | 1 | |||
| 10 | Cable tie | Reichelt | fix the servo cables | 1 | ||
| Overall | 9€ | |||||
| Optional | ||||||
| 1 | Power Supply 0-30V 0-5A | Reichelt | Power supply to permanently power the robot – hardly recommended | 80 | 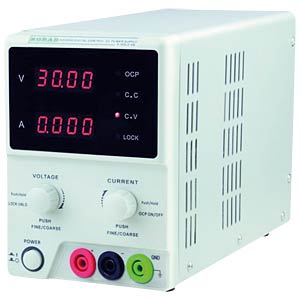 |
|
| 1 | Cable | Reichelt | Used to connect the power supply with the robot. | 3 | 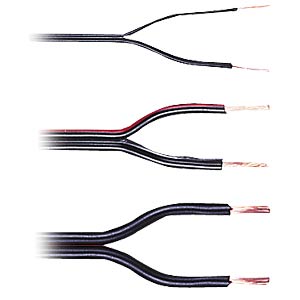 |
|
| 2 | Connector | 1x Reichelt 1x Reichelt |
Soldered to the cable to connect it to the power supply. | 2 | 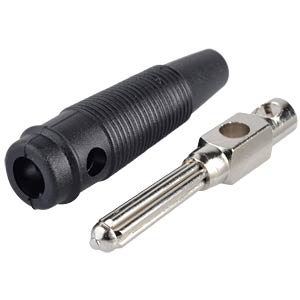 |
|
| 1 | 15cm Cable | Aliexpress (10 in one set/lot) | Hobbyking | (same item as mentioned above, if you order a pack with 10 you have it already) Cut the cable in the middle and solder the side without the pins to the cable above. That way you can plug the cable from the power supply into the PCB like a servo. This will power your robot permanently. Set the voltage to 6.6V |
2 | |
Hallo Johannes
Hier ein paar Bemerkungen zu den Teilen:
1) Bei der Batterie hast Du beim einen Link eine 1800mAh, beim alternativen eine 2500mAh ausgewählt. Ich denke die 2500mAh ist sicher besser, oder?
2) Der “Acc & Gyro” wird aktuell nicht unterstützt. Werder von der SW noch von der Anleitung, richtig?
Falls ein Raspberry Pi3 eingesetzt wird:
4) Grösse der SD besser 16 GB (allenfalls sogar 32 GB, aktuell muss Image vor dem flashen verkleinert
werden (siehe Kommentar unter SW)
5) “WLAN Stick” ist im Pi3 schon eingebaut – braucht es also nicht
6) “Speaker Trust Izzi” wird nicht mehr hergestellt und ist in der Schweiz praktisch nicht (mehr) erhältlich.
Ich habe nun einen X-Mini II genommen. Der sieht praktisch identisch aus.
7) Der “Tantal 22uF” Kondensator ist auf dem Foto der Bestückten Platine
(unter ‘Platinen Aufbauanleitung’) ein Elko und kein Tantal Kondensator. Ich nehme an Tantal ist ok, oder?
Viele Grüsse
Matthias
Hallo Matthias,
ja, das passt alles soweit.
Zu 2): Beschleunigungs und Gyrosensor werden nicht komplett unterstützt, die Basis-SW ist aber fertig. Also es gibt eine ROS Node (SW), die alle Werte in einem ROS Topic sendet und am Bildschirm anzeigt. Am Pi3 muss vermutlich noch der I2C Bus eingeschaltet werden, damit hier Werte ankommen (siehe Google). Testen kann man die Node mit “rosrun gero_sense acceleration”. Hier müssten dann alle Beschleunigungswerte auf dem Bildschirm angezeigt werden. Falls die Node noch nicht erstellt wurde geht dies im Ordner “ROS” (bzw. Catkin_ws) mit “catkin_make –pkg acceleration”.
Um die Werte zu nutzen kann man eine einfache Node mit Python oder C erstellen, die dann z.b. beim umfallen automatisch ein Wiederaufstehen startet.
Hallo Johannes
Noch eine Frage zum Speisen des Roboter via Netzteil.
Oben schreibst Du, dass man sein Kabel mit einem Servo-Verlängerunskabel bauen soll und dann als Servo anschliessen. Aber auf diese Weise werden doch die eine Hälfte der Servos via zwei Termo-Fuses gespiesen, während die andere Hälfte über gar keine Fuse gespiesen werden. Klar man kann beim Netzteil eine Strombegrenzung einstellen, aber wäre es nicht besser, den Roboter via dem Anschluss für die Batterie zu speisen? Natürlich muss man dazu einen Stecker (den man oben sowieso bestellt hat) krimpen (oder quetschen und löten), was etwas Geschick oder das entsprechende Werkzeig benötigt.
Gruss
Matthias
Hallo Matthias,
da hast du Recht, das ist etwas aufwändiger aber etwas sicherer.
Ich hatte teilweise auch Akku und Netzteil gleichzeitig angeschlossen, dann läd der Akku und man kann ihn mal mit mal ohne Kabel nutzen, war auch ganz praktisch. Ist allerdings natürlich nicht die optimale Ladung für den Akku, da die Zellen nicht eizeln geladen werden…
Viele Grüße!
Johannes
Hallo Johannes
Jetzt habe ich gerade noch etwas merkwürdiges festgestellt.
In der Liste oben schreibst Du, dass die batterien einen XT-60 Connector haben (was sie auch haben).
Unten dann steht aber man soll JST-2S Connectors bestellen für das PCB. Nun hat aber nur der Ballancing-Anschluss so einen Stecker. Dieser wäre aber auch etwas unterdimensioniert für den Batterieanschluss..
Wie hast Du denn Deine Batterie angeschlossen?
Danke und herzliche Grüsse
Matthias
Hallo Matthias,
ich hab die Batterie über den Balancer Stecker angeschlossen, hat soweit gut funktioniert. Kannst du aber natürlich auch über den JST Anschluss machen, glaub da gabs keine Stecker fürs PCB… bin aber nicht mehr ganz sicher. Kann man sonst aber natürlich auch ein Kabel aufs PCB und an den Stecker löten.
Viele Grüße!
Johannes
Hallo Johannes
Was war die Idee, wo Du das ‘Accelerometer Gyroscope Module’ hast anschliessen, resp. einbauen wollen?
Danke und Gruss
Matthias
Hallo Matthias,
da gabs 2 Ideen: Zum Einen dass er erkennt wenn er umkippt und in welcher Lage er liegt und dann die entsprechenden “Aufstehen” routienen startet. Das ist auch heute schon ziemlich leicht mit ein paar Zeilen Code umsetzbar. Oder auch dass er die Arme zum Schutz beim Umkippen bewegt.
Zum Anderen Dinge wie den Gang stablisieren oder ihn selbständig laufen lassen, also ein dynamischer Gang. Da wirds aber ein bisschen komplizierter, bin da nicht tiefer eingestiegen…
Viele Grüße!
Johannes
Hallo Johannes
Vielen Dank für diese Anwendungsideen. Meine Fragen zielten vielmehr darauf ab, wie Du den Sensor elektrisch hast anschliessen wollen? Er hat ja einen I2C Anschluss. Darum nehme ich an, dass dazu der 4-Pin Steckanschluss gedacht war, richtig?
Danke und Gruss
Matthias
Hallo Matthias,
ja, genau richtig 😉
Viele Grüße!
Johannes
Hallo Johannes
Was hier fehlt, sind Schrauben um die 3D-Teile und den Raspberry zu befestigen.
Gruss
Matthias
Hallo Matthias,
du hast Recht… teilweise kann man Schrauben vom Roboter nehmen, da müssten einige überigbleiben. Teilweise sind diese aber nicht lang genug.
Wenn du genaueres dazu hast, was fehlt, ergänze ich es gerne oben.
Beste Grüße!
Johannes
kommt bald, bin noch am herausfinden, wie es am Besten geht..
Gruss
Matthias
Hallo Johannes,
Ich habe den “Tantal 22uF” Kondensator eingebaut. Er überhitzt jedoch sehr schnell bis zum Qualmen. Habe jetzt eine Elko 22uF bestellt. Ansonsten funtionniert die Platine anscheinend einwandfrei (Raspi hat problemlos gebootet).
Gruss
Guy
Hallo,
Ich habe einen “Elko, 22µF/63V, RM2,5” eingebaut.
Jetzt funktionniert die Platine einwandfrei.
63V ist etwas hoch gegriffen ein kleinerer würde wohl auch halten.
Gruss
Guy